- Published on
Tkinter Frame Tutorial - GUI with Python
- Authors

- Name
- jvip
- @PythonRoadmap
Table of Contents
Introduction to Frame Widget
Frames in Tkinter are very useful to organize and group different widgets together in a window. You can consider frame similar to div in frontend, it works as a container for other widgets like button, textarea etc. With frames, you can create clutter-free GUI by dividing the window into different sections.
Why should you use Frames?
We gave a little summary above, let's understand better with points :
- Organization : Frames are very useful to organize your widgets in a window. You can create clutter-free GUI by dividing the window into different sections.
- Grouping : Frames are also useful to group different widgets together. This helps with maintaining a clean code.
- Aesthetics : Frames help in improving the overall user-experience of your GUI application.
Tkinter Frame Example
Let's deep dive and understand how to create Tkinter frame with an example, create a new python file main.py and write the following code :
import tkinter as tk

root = tk.Tk()
root.title("Tkinter Frame Example")

# Creating a frame
frame = tk.Frame(root)
frame.config(bg="lightblue", borderwidth=2, relief="solid")
frame.pack()

root.mainloop()
This is a basic example of how to create a Tkinter frame using the Frame class. Right now we've created a empty frame, with light blue background and black border of width 2px. Let's add a label, and a button to this frame.
How to add widgets to a frame?
You must've noticed that we used .pack() method in the earlier code. This method is used to add widgets to a frame. Let's understand with an example :
# Add a label inside the frame
label = tk.Label(frame, text="A label inside the Frame!")
label.pack()

# Add a button inside the frame
button = tk.Button(frame, text="Click Me")
button.pack()
This adds two widgets to the frame, one label and one button. Let's see the output :
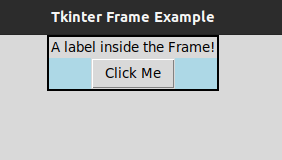
As you can see, we have a frame with 2px solid black border and light blue background. Inside the frame, we have a label and a button.
Tkinter Frame Configuration
For this tutorial, we only configured the frame's background color and border for visibility purposes. You can configure many more options in a Tkinter Frame, as follows :
- borderwidth
- background
- cursor
- height
- padx
- pady
- takefocus
- width
- and many more, see the complete list here : Tkinter Frame Configuration
Nested Tkinter Frames
You can also create nested frames with tkinter. This allows you to create sub-sections within a frame. Nested frames are essential for complex GUI applications. Let's see an example :
inner_frame = tk.Frame(frame, bg="lightgray")
inner_frame.pack(pady=10)
This creates a nested frame inside the parent frame frame. We've also added a padding of 10px to the inner frame's Y axis.
Example of Nested Frames
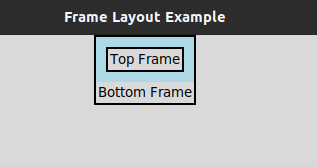
Let's create a slightly complex GUI application with nested frames to better understand this concept. We will create a window with a parent frame and 2 nested frames.
import tkinter as tk

root = tk.Tk()
root.title("Frame Layout Example")

root_frame = tk.Frame(root)
root_frame.config(bg="lightblue", borderwidth=2, relief="solid")
root_frame.pack()

# Frame for the top section
top_frame = tk.Frame(root_frame)
top_frame.config(borderwidth=2, relief="solid")
top_frame.pack(padx=10, pady=10)

# Frame for the bottom section
bottom_frame = tk.Frame(root_frame, bg="lightgray")
bottom_frame.pack()

# Adding widgets to top frame
label_top = tk.Label(top_frame, text="Top Frame")
label_top.pack()

# Adding widgets to bottom frame
label_bottom = tk.Label(bottom_frame, text="Bottom Frame")
label_bottom.pack()

root.mainloop()
Let's see the output :
Conclusion
This post is part of a series of posts that will explain how to use Tkinter in Python GUI Programming. In this blog post we learnt how to use Tkinter's Frame Widget. We also learned about different configuration options, nested frames and how to use frames to organize widgets in a window.
If you love this small tutorial, please give us a share or follow on Twitter.
Feel free to comment if you have any questions or suggestions. As always, keep learning 🤞
